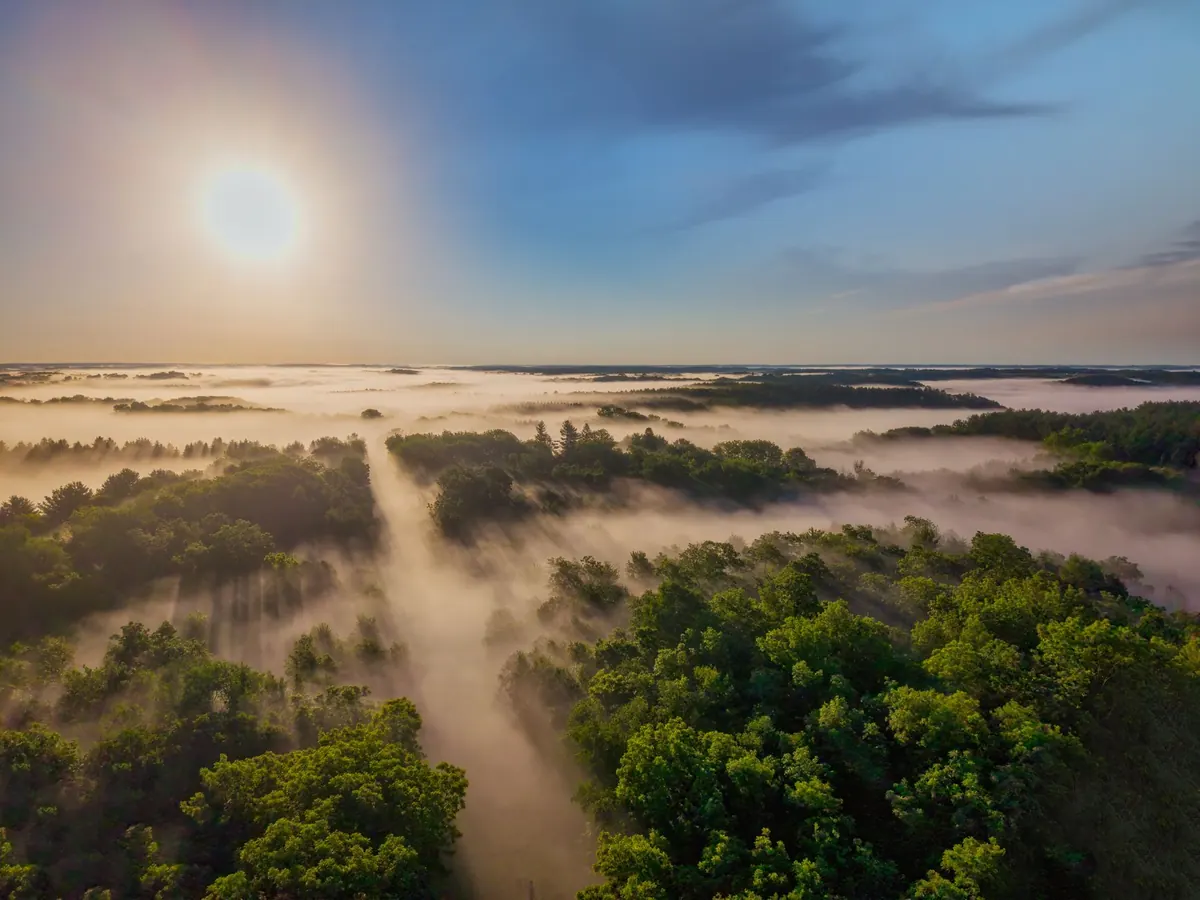
Woodland fog at sunrise is one of the few subjects that rewards an early alarm. The air is still, sound is muffled, and trees appear in layers that shift as the light climbs. You do not need expensive gear to make the most of it. You need a plan, a reliable forecast, and the patience to wait for the moment when mist catches the first warm light.
Fog is fickle. A promising forecast can vanish by 4am, and a clear valley can turn into a grey wall within minutes. Check the weather the evening before and again when you wake. Look for clear skies, light winds and high humidity. Radiation fog forms when the ground cools overnight and the air near it reaches its dew point. Valley bottoms, slow-moving rivers and damp woodland are the most likely places. Coastal mist is different: it can arrive with a sea breeze and often burns off quickly.
Choose two locations within easy reach of each other. A large wood with a mix of open glades and dense stands gives you options if the mist is patchy. Study a map for public footpaths, car parks and gates. Pack the night before: camera, tripod, spare battery, lens cloth, head torch with a red light, flask, waterproof jacket and boots. A bin liner over your bag keeps drizzle off while you set up.
Temperature, dew point and wind speed matter more than a generic cloud icon. If the forecast shows a dew point within a degree or two of the overnight low, and winds under about 10 mph, mist is likely in sheltered spots. Fog warnings from the Met Office are useful, but local knowledge beats a national map. A valley you know floods with mist on still autumn mornings; a ridge above it may stay clear. Use an app that shows hourly dew point and wind, and compare it with a webcam or a look out of the window.
Civil twilight begins about half an hour before sunrise in the UK, earlier in summer. The best light often arrives just before the sun clears the horizon, when mist glows pink and blue. After sunrise, mist can thicken briefly as the ground warms, then thin into rays. Do not pack up at the first bright moment. Stay for twenty minutes after the sun appears; the contrast often improves.
Mist is bright, low-contrast and full of subtle tones. Your camera's meter will try to make it mid-grey, which usually means the scene looks too dark. Start in manual mode or aperture priority with exposure compensation. A typical starting point is ISO 100–400, f/8–f/11 for depth of field, and a shutter speed fast enough to freeze leaves if there is a breeze. Use a tripod, even in daylight, so you can slow down and check the histogram.
Expose so the brightest mist is not blown out. The histogram should sit towards the right without clipping. If the scene is mostly mist, add +0.7 to +1.3 EV and check. If dark trunks dominate, you may need less. Bracket three frames at one-stop intervals if you are unsure. Shoot raw so you can lift shadows and adjust white balance later. Auto white balance often makes mist too blue; try daylight or a custom setting around 5500K.
Autofocus can struggle in low contrast. Use single-point AF on a trunk or branch, or switch to manual focus and use live view with magnification. Focus a third of the way into the scene for a deep view, or on the nearest interesting tree if you want a soft background. Wipe the front element often; mist condenses on glass and creates hazy spots that are hard to fix later.
Fog simplifies a scene, which is a gift. It hides clutter and turns a messy wood into layers of shape and tone. Look for separation: a dark trunk against pale mist, a path curving into nothing, a single branch catching light. Move your feet before you move your zoom. A few steps left or right can change the relationship between foreground and background completely.
Pre-dawn woods are dark, quiet and often muddy. Tell someone where you are going and when you expect to be back. Check phone signal before you leave the car; many rural woods have none. Wear boots with grip, use a head torch on low red light to protect your night vision, and carry a paper map or offline map. Stick to public footpaths and access land unless you have permission. Do not block gates or farm entrances.
Wildlife is active at dawn. Keep a respectful distance from deer, badgers and nesting birds. In spring and summer, adders may bask on sunny paths; watch where you step and never handle one. If you are photographing on private land or a commercial woodland, check access rules first. For any health concern, however small, speak to a pharmacist or your GP. The aim is to return with photographs and without incident.
Keep your first trip deliberately small. Pick one wood you know, arrive forty minutes before sunrise, and give yourself time to listen and look. Set up in a spot where you can see layers, then work the scene for fifteen minutes before moving. Change lens, change height, change direction. Fog rewards persistence more than equipment.
Woodland fog is unpredictable, which is part of its appeal. Some mornings will be a washout. Others will give you ten minutes of extraordinary light. Go often, learn your local woods, and the odds shift in your favour.
Photo: Tom Fisk / Pexels
A practical packing guide for nature photographers heading into the British outdoors, covering cameras, lenses, rain...
How to find, time and photograph Lake District fog — accessible viewpoints from Buttermere to Tarn Hows, exposure...
A practical guide to photographing Britain's spring wildflowers: reading the bluebell season, working with soft...

Exploring misty landscapes and quiet natural places.
